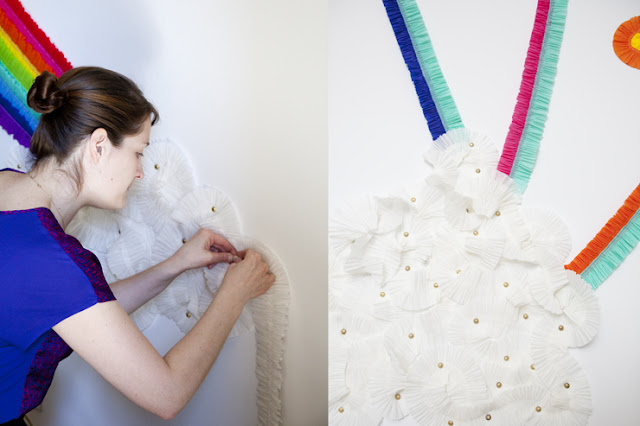
My friend Chelsea, a surface pattern designer and artist, makes some of the best party decor I’ve seen. Once I went to her house for a party and she had created an elaborate weaved crepe paper installation. I was in love with the it- so fun and colorful. I asked her to share a project here and give us some tips on creating our own crepe paper installations.
The materials are super minimal and once sewn the crepe paper is much more durable and could even be used again. Chelsea picks a theme, for this one rainbows, and just plays with the materials trying to fill up the space. There’s so much creative room for play with the colors you use and how you can hang, twist, stripe, weave and polka dot your space with sewn crepe paper. I imagine this design would be perfect for a kids party!

MATERIALS
- 10 rolls (Target is inexpensive and has a wide color selection)
- upholstery tacks NOTE: these will make holes on your wall. You can try taping the crepe paper to avoid the tacks, but creating shapes like the clouds is hard to do without tacking them down.
- sewing thread
INSTRUCTIONS
1. Sew two to three pieces of crepe paper together using your sewing machine. Chelsea used this tutorial by Dana Made It. To keep things simple she only used the forward stitch and taped the sewn ends of the crepe paper to avoid unraveling.
2. Visualize your theme & play with the materials. Think of threading them together like a weaving, twisting them into spirals, or even hanging them from a dowel over the way or a doorway.
- The cloud is made by creating flat circular shapes anchored by tacks and twisted into three-dimensional single spirals.
- The rainbow is 5 rows of the sewn crepe paper.
- Polka dots are three pieces of crepe paper sewn together and mounted with a single tack.
- Definitely play around with the paper. It’ll want to lay or fall certain ways.
FYI - Chelsea will leave her installations up for awhile and noticed that direct sunlight fades the colors and darker colors can stain your fingertips a bit.
Chelsea also has a Etsy shop, Blue Ship Wreck. And you should totally hit her up for creating an installation for you! I want one in my studio in black and gray and lime!


No comments:
Post a Comment
thanks for stopping by and leaving a comment!! it's nice...