Make Mail! DIY Button & String Envelope
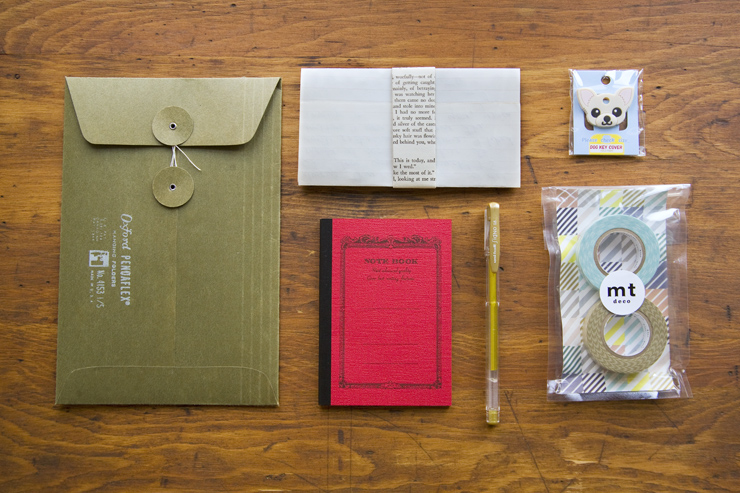 Making and receiving good mail – not bills, not ads, no junk, but a hand written letter – is such a pleasure. I've always been smitten with stationery and office supplies, especially if it's vintage. I don't think I'm the only one who gets excited to shop for sticky notes, new pens and gummed labels!
I wanted to send a nice package to my mother. I wanted her to know that I was thinking of her and make her feel special, so I put together this little fun, creative care package. I got a bunch of little things at one of my favorite NY haunts, Kinokuniya, a Japanese book store, and shipped them to CA in a handmade button & string envelope. You can make yours any size- just use any envelope size as a template. Or you can use one of these wooden templates or these envelope template Illustrator files. This is the kind of envelope I used (6 x 9"), and lots more free templates here.
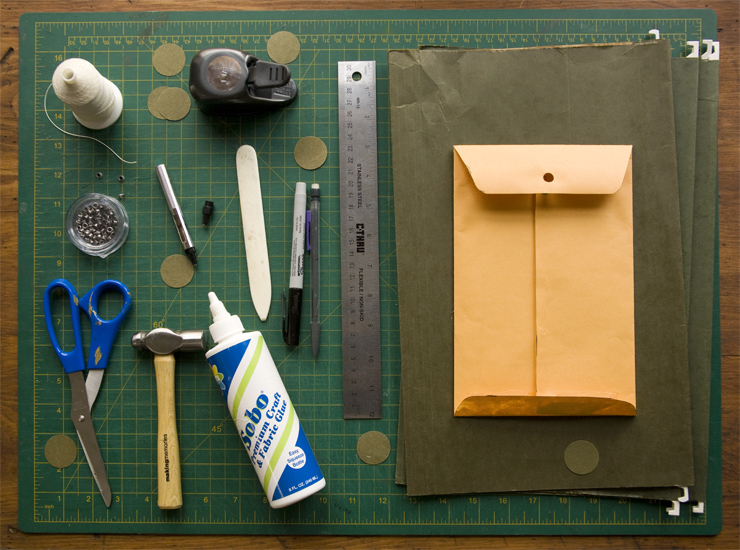
You'll need:
 Making and receiving good mail – not bills, not ads, no junk, but a hand written letter – is such a pleasure. I've always been smitten with stationery and office supplies, especially if it's vintage. I don't think I'm the only one who gets excited to shop for sticky notes, new pens and gummed labels!
I wanted to send a nice package to my mother. I wanted her to know that I was thinking of her and make her feel special, so I put together this little fun, creative care package. I got a bunch of little things at one of my favorite NY haunts, Kinokuniya, a Japanese book store, and shipped them to CA in a handmade button & string envelope. You can make yours any size- just use any envelope size as a template. Or you can use one of these wooden templates or these envelope template Illustrator files. This is the kind of envelope I used (6 x 9"), and lots more free templates here.

You'll need:
Paper or card stock (I used a vintage file folder)
Old envelope (for template)
Pencil/sharpie
Scissors
Ruler
Bone folder
Glue
1" circular punch
Eyelet & eyelet tool set
Craft or regular hammer
Cutting board
11" string (I used unwaxed linen thread)
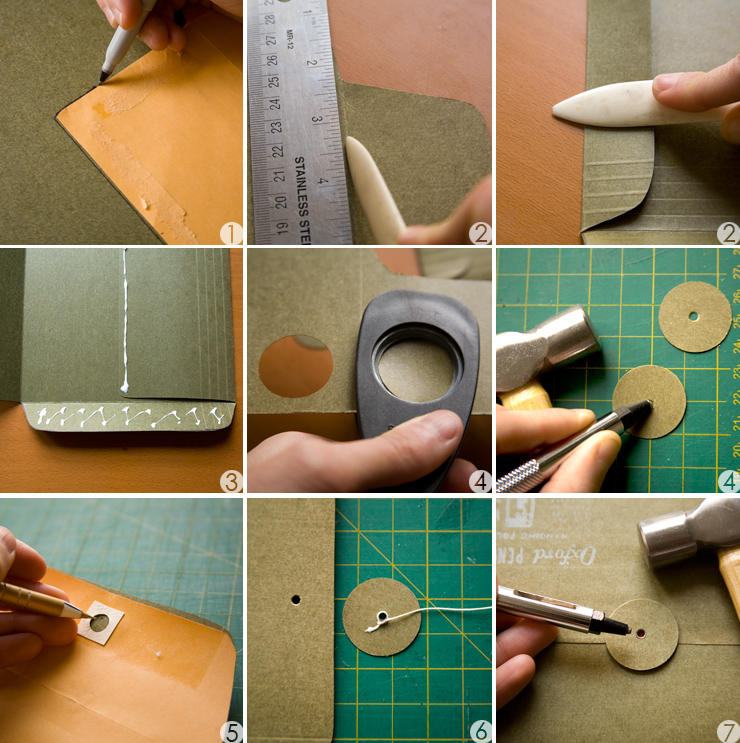
- Carefully open all the seams of an envelope that you'd like to recreate. This is your template. Place it over your own paper and trace the outline with a pencil or sharpie, and then cut out the shape.
- Use a ruler and bone folder to score and fold the flaps of the envelope.
- Glue the sides and bottom flaps together. Don't use too much glue. Place a scrap piece of paper into the envelope, so you don't accidentally glue the envelope shut.
- Punch or cut out your button shapes. They don't have to be circular! Use your eyelet kit and hammer to punch holes in the center of your button shapes over a cutting board. (The eyelet punch will be round, hollow and has a sharp edge.)
- Mark the envelope flap in the center where the top button will be. Your template envelope may have this measured for you. Punch a guide hole here with the same eyelet punch. Tie string around an eyelet.
- Place one button part over the eyelet tied with string, then place the flap over the button piece. Use the eyelet setting tool and hammer against the straight end of the eyelet. Don't tap the hammer too hard or you'll smash the eyelet too much.
- Mark where the second button will be placed about 1 inch from the first button on the flap. Insert a small cutting board or hard surface into the envelope. Punch the eyelet hole. Insert eyelet, then the second button shape, and set the eyelet.

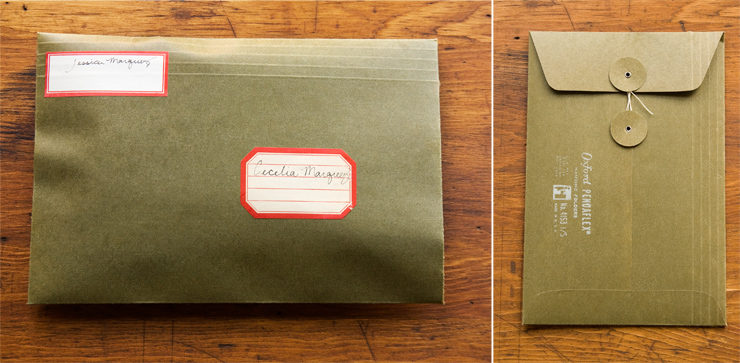
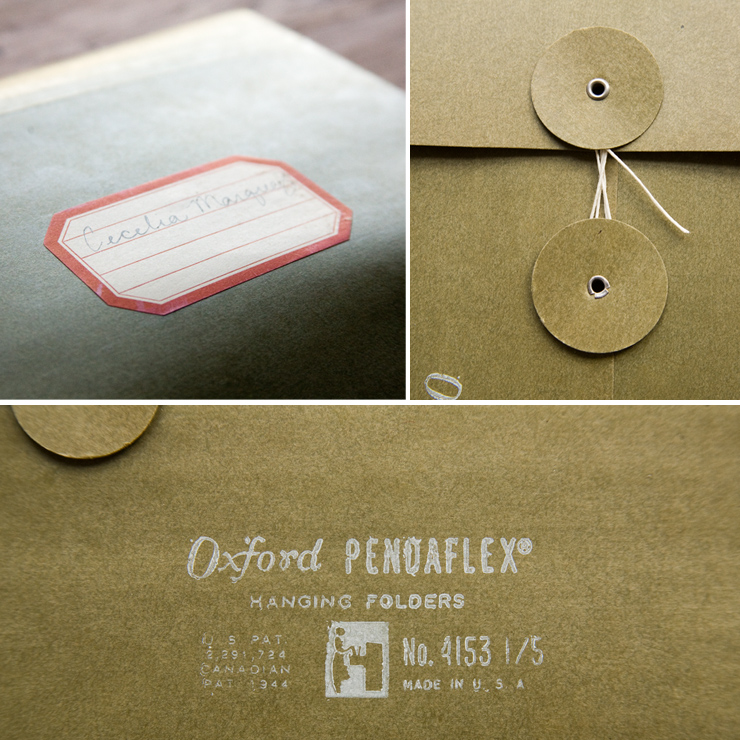 My favorite part are the little, vintage details: the gummed label, the screen printed label on the file folder, and of course the button & string closure...
Make someone's day and make them a good mail day package!! Have you ever received a surprise package that made your day? One year for my birthday some friends made me a package full of vintage goodness, embroidery threads, and even a tea pot!

Love, love, love projects like yours...simply awesome!
ReplyDeleteFantastically beautiful! I love this. Can't wait to make them!!
ReplyDelete